If you’re looking for a cheap, easy, and fun Miraculous Medal craft for kids, you’ve come to the right place! This craft is made from heavy duty foil, and can be enjoyed by children of all ages! No drawing skills needed- just trace the Miraculous Medal template that’s free to download. 😉 You can find all of my ideas about how to honor Mary with kids in May here, and today we are going to make a miraculous media craft for Catholic kids.


The Miraculous Medal has Mary on it (more specifically, Our Lady of the Immaculate Conception) as she appeared to St. Catherine Laboure. Mary told St. Catherine to “Have a medal struck upon this model. Those who wear it will receive great graces, especially if they wear it around the neck.” This larger-than-life Miraculous Medal made from foil may be too big to wear around your neck, but it can certainly help teach children about the Miraculous Medal! Read more about St. Catherine Laboure and the Miraculous Medal here.
St. Catherine Laboure’s feast day is on November 28, making this a perfect day for this craft! You can find all my resources on November feast days here.
Supplies Needed to Complete this Craft:
- Free, downloadable Miraculous Medal Template
- Sheet of Fun Foam
- Heavy Duty foil
- Dull Pencil
- Assorted colors of Sharpies (optional)
- Key Ring Loop (optional)
Here are some dates that are great for remembering the Miraculous Medal:
- July 18-19- Mary first appears to St. Catherine Laboure
- November 27- St. Catherine Laboure receives her mission from Mary to make and distribute the Medal of the Immaculate Conception, now known as the Miraculous Medal. (This is the feast day of St. Catherine Laboure)
- May is the month devoted to Our Lady.
- Anytime! The Miraculous Medal is a Catholic favorite. 😉
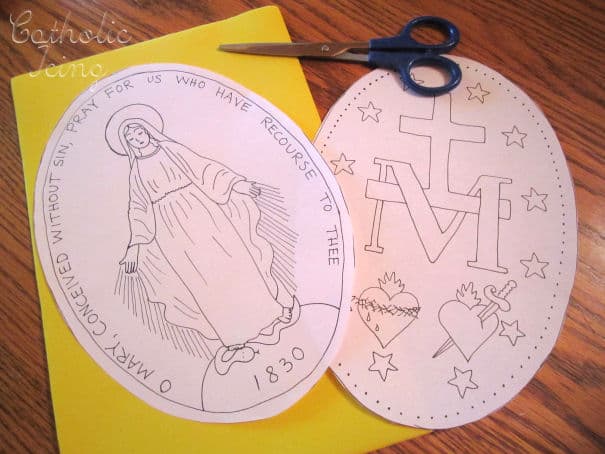
Start by downloading the Miraculous Medal template (available above) and cut it out. Trace around the template onto a sheet of fun foam, and cut that out as well.
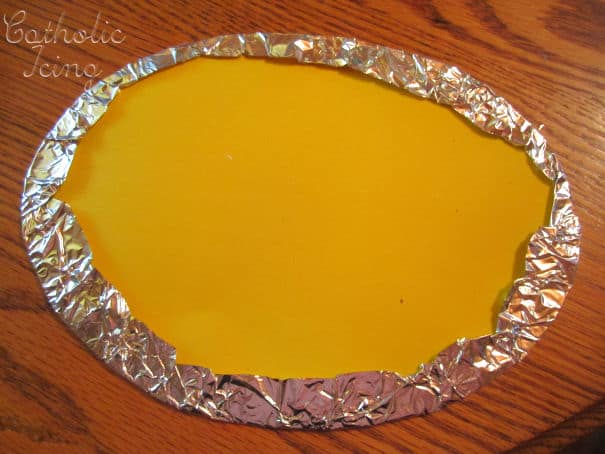
Use heavy-duty foil. Handle it carefully so it doesn’t get any unwanted creases in it. We found that cutting it with scissors rather than using the built-in foil-tearing-thingy helped keep the foil smooth. Cut the foil into an oval that’s a little larger than your fun foam oval, and wrap around the back, keeping the front smooth.
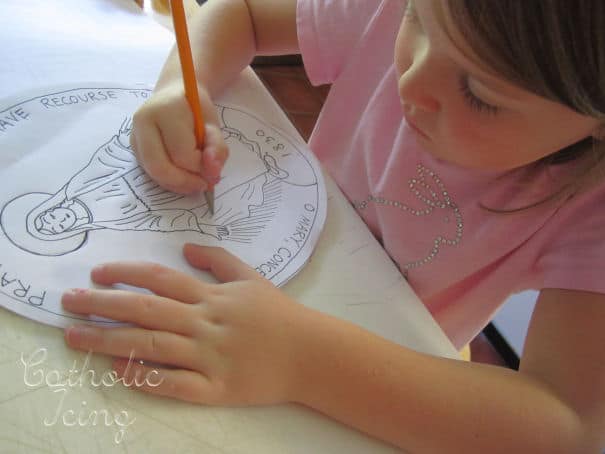
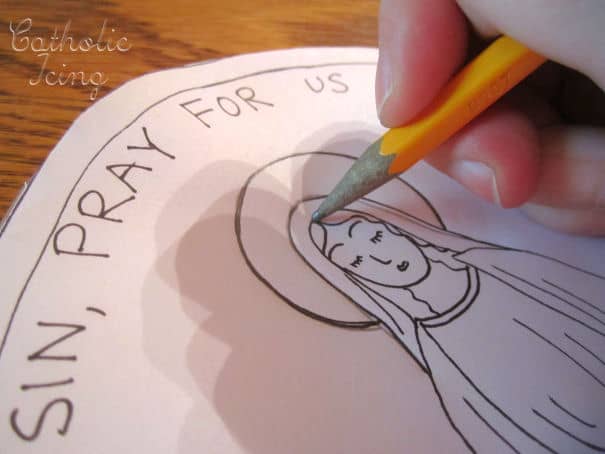
Lightly tape your Miraculous Medal template onto your foil to keep it in place. Trace the picture with your dull pencil using good pressure to dent the foil underneath. *Hint- using a colored pencil may help your child better see where she has or hasn’t traced yet.*
This worked really well! If your child can handle a pencil well enough to trace lines, this craft will be a success!
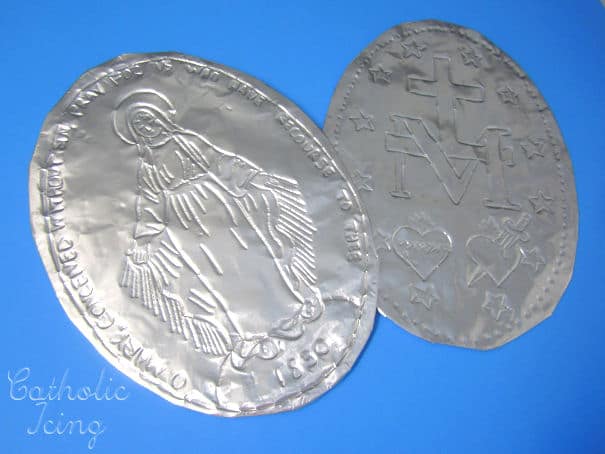
When you’re finished, cut the tape to release the template. Don’t pull at the tape, because you don’t want to crinkle your foil. Repeat with the back of the medal. When you’re finished tracing the images on the foil, you should have something that looks a lot like this:
You can totally stop right here! I mean, most Miraculous Medals are just silver anyway, and up to this point, it’s very hard to mess up this craft- lol! Just glue the front and the back together (we used a hot glue gun).
Post continues after this brief information about the Catholic Icing Monthly Membership
Monthly Liturgical Membership
We also punched holes in the top of the foil with a hole puncher and laced a key ring through it.
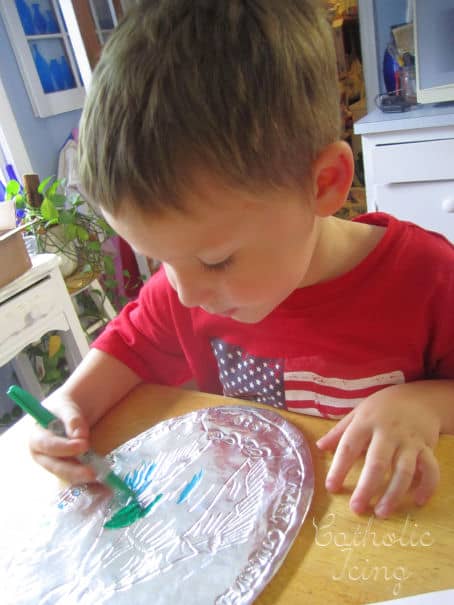
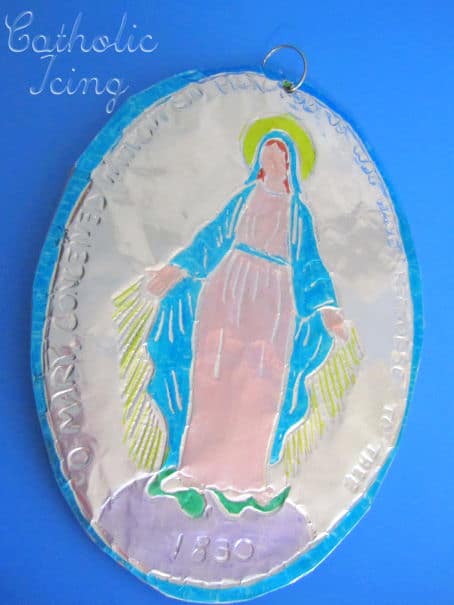
If you’d like to craft something a little more eye-catching, you can color your big Miraculous Medal with Sharpies. Just use the side of them and don’t push down so hard that you puncture the foil.
My 4-year-old and 6-year-old love to color on foil, so this was a hit! Here’s a picture of the ones my kids colored:
Front of Miraculous Medal Craft
Back of Miraculous Medal Craft
That’s it! Hang your craft up and enjoy! These are just adorable. It’s the kind of craft that kids bring home from CCD and it ends up hanging in your kitchen forever. I think these would be so cute hanging up all down the hallway at a Catholic school for parent night or something. These really are fun!
To find more resources on the Miraculous Medal for kids, check out my Catholic Awesomeness Pinterest Board! (And if you’re still resisting joining Pinterest, stop! It’s the most awesome way to save links EVER!) 😉 Sorry I missed the First Friday linky thing last week- things have been crazy around our house! But the new baby is calming down, and I’ve got some more crafts in the works, so hopefully I’ll be posting again soon. God bless! 🙂
If you’re looking for more ideas, check out my other resources on how to honor Mary with kids.
You can find all of my resources for living the liturgical year in November here.








Love this craft! I think my kids would enjoy it! I’m pinning it to my craft board and you’re right, it is so easy to save links via Pinterest! It took me awhile to get the hang of Pinterest, but once I “got it” I’ve been pinning away and saving things easily from websites 🙂
I love this! I have been looking for activities that I can do with my 4th and 5th grade REP students next year. I am really excited because I will finally have GIRLS! lol I think that they would love something like this!
Once again, I have a craft I love, thanks….I am doing this for the first day of religious ed…for Mary’s birthday in Sept. 8…..
TO Alicia:
I also teach 5th grade and I usually have between 15-20 kids, I always make sure the kids know that it would hurt my feelings if I ever found any crafts thrown away, (ONE child did it prior to leaving class each week) I tell them I donate the crafts, I PAY for all of them. IF YOU do not want them, I can take them and donate your finished craft to the nursing home……I think boys are embarrassed, the boy that would throw them away had older brothers that would tease him about the crafts. Another child would get teased on the car ride home…..so they always donated a few things, we also would have the kids color and I would drop off their pictures at the nursing home, what a wonderful thing to see the doors decorated with our pictures!
Marilou, that’s a great idea! Sometimes the fellers don’t want to take their pretties home, but being able to donate them would give them a purpose for making them and doing their best AND would brighten the door at a nursing home.
Normally, I skip over a lot of craft ideas but this is one we might actually finish! (Starting is never a problem!) Thank you!
Love this one, Lacy! We will be giving it a whirl. Your Pinterest board is full of loveliness…I haven’t gotten into it but I sure do admire everything I see:) Hope you are doing well and having a blessed summer! I still have your book review on my list of things to do:) God bless you my dear!
You too, Tiffany! I have Pinned plenty of your stuff, and need to pin more of it. 🙂 Can’t wait to see what your family does with the Miraculous Medals. You are so creative!
Love it! I’m rounding up some crafts for some of the staff member’s kids at the Youth2000NY retreat next week, and this is perfect. Have a beautiful week.!
Lacy, this is really nice! Foil is always fun to use!! God Bless!
You make teaching Faith Formation so easy! Thank you!! This is wonderful!
This is great. We’ll be doing this for our Little Flowers St. Catherine Laboure meeting. I think the girls will really like it.
Thank you so much for this great craft!!
My 10 year old adhd daughter managed to complete the whole activity in one sitting—and it turned out lovely!!
You can check it our here: http://www.tenkidsandadog.blogspot.com/2012/07/giant-miraculous-medal-craft.html
Going to check it out!
I have nominated you for a blog award. I love your site!
Thanks so much! You’re so sweet! 🙂
Okay, I must ask… where did you find a skin-colored Sharpie??? If they make such a thing, I am very impressed and now must go explore the world of new Sharpie colors, ha ha! Back in my day, all they made were black, red, blue, and green (and I’m only 32)… I have seen pink and lime green now, but not peach!
I got it in a big variety pack. I finally treated myself to a huge pack of sharpies and I’m very happy with them. 🙂
I was going to make our noodle rosary this month, and this craft would be PERFECT for the miraculous medal! COOL! I’ll just line it with cardboard on the inside. You’re so awesome!
I love this craft idea and will be trying it out with ten 4th graders next week. I am not a crafter by nature though, and was wondering if each side of the medal is glued to it’s own piece of foam, and then they are glued together, or if both templates are traced on the same piece of foam.
Also, do you just glue around the edges, or all over it?
Thank you for the great idea!
We didn’t glue it at all. The foil just wraps.
You talked about using hot glue to glue it together. Did you leave the foam inside the foil before attaching the front and back?
Yes
Love this project! Thanks for sharing!
This really looks wonderful. What a great idea! I want to try this with my fourth graders (Faith Formation at my parish).
God bless you for all these attractive/useful/wonderful crafts for kids and their parents, for catechists/priests and their classes.
Thank you from Romania!
Mia
Awww thank you so much for this lovely comment! God bless!!!
This page appeared in my inbox on Feb. 11, 2012, and I was hooked on Catholic Icing! As Coordinator of Catechetics for our Lubbock (Texas) Diocese at the time, I quickly spread the news of this awesome resource for our Catechists, and have been amazed at the volume of projects Lacy has created over the years since then. I continue to spread the news, and to be amazed and delighted with her creativity! It is one of the first places I look for ideas to cele-brate feast days, Sacraments, and other special times! What a blessing it continues to be!
I did this with my first grade CCD class and it was totally possible! I prepared all the ovals and aluminum foil so they just traced when I got to class. I could “lecture” while they traced. A perfect project! Thank you for this!